Below are some tips on how to grow elderberries at home.
Useful for making pies, syrup, and jam, elderberries are fragrant and versatile fruits. Elderberry wine is a well-known restorative and refreshing drink. The jelly also provides a delightful change from other summer favorites.
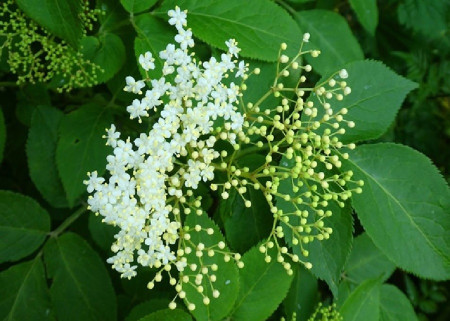
Elderberry plants bear purple-black berries and have white flowers in spring and summer. These flowers help attract pollinators to your garden.
How to Plant Elderberries
Elderberries can be successfully raised from seed or propagated from cuttings.
Location
There are different varieties of elderberries, so a site needs to be chosen accordingly for each type to thrive.
Most elderberry shrubs thrive in warm areas with up to six hours of direct sunlight each day. This helps them produce many flowers and berries. However, some cultivars prefer partial shade.
To begin with, the American elderberry is a good choice, as it enjoys full sunlight to partial shade. You can grow it as a potted plant on your patio if you have a large pot and plenty of space.
Soil
It’s important to prepare the soil before planting. Well-drained, loamy soil will give the elderberry plants a good chance to develop. Also, these plants thrive best in soil with a pH of 5.5 to 6.5.
Increase acidity by adding some compost or sphagnum peat. Leaf mold can also be added, or even pine needles if pines are native to the area. Additionally, incorporate plenty of organic matter if the soil is sandy.
Growing From Seed
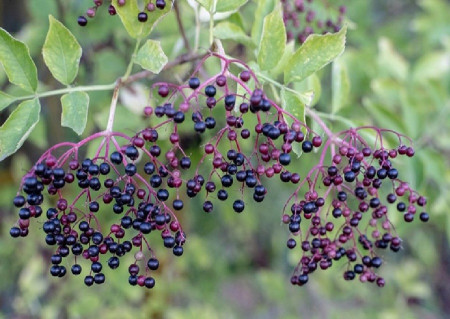
Collect the seeds at the end of summer or the beginning of fall when the berries are fully ripe (plump and dark purple). The seeds have a hard outer shell; therefore, they will need stratification for good germination [1].
Gathering the Berries
To harvest elderberry seeds, gather bunches of berries and place them in a container.
Next, rub and crush them until the seeds separate from the pulp. Afterward, cover the crushed berries with water and soak them for at least a day.
While soaking, mix occasionally. The bad seeds, along with the pulp, will float to the surface. Throw away the unusable seeds, then strain the water to collect the good seeds.
Next, spread the seeds on newspapers to dry. You can then store them in a cool, dry place until they are ready for stratification.
Stratification
Chilling the seeds (stratification) is essential, as they can take up to five years to germinate without treatment.
Soak them in water for 3 days, then wrap them in a paper towel and place them in a sealable plastic bag. Next, place them in the refrigerator for 60 to 90 days.
Planting
The best time to plant elderberry seeds is in the late fall. Cover the seeds with moist, fertile soil. Additionally, keep watering through the first frost to prevent the soil from drying out.
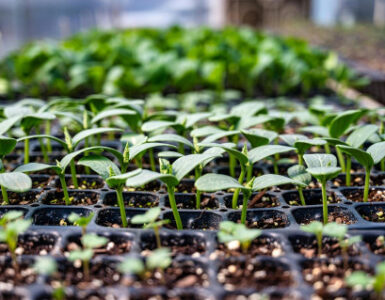
To pot out, carefully pick out the seeds and sow them in trays filled with potting medium to a depth of half an inch.
Seeds need to be spaced 2 inches apart, misted, and covered lightly with mulch. Keep them in a warm, bright room with temperatures above 68 degrees.
Check for moisture every few days and mist (not soak) if none is present.
If temperatures are ideal, germination will happen in 4 to 6 weeks. However, it may take several months for seedlings to show up.
Transplanting Elderberry Seedlings
Grow the seedlings under nursery conditions for at least a year. Shelter them from strong winds and provide proper lighting until their roots develop.
Afterward, plant them out in the garden in fertile, well-draining soil, spacing them 6 to 10 feet apart. Also, water regularly and place some mulch around the roots.
Elderberry trees do not require much fertilization, as they get most of their nutrients from organic matter in the soil.
Propagating From Cuttings
To grow elderberry from cuttings, you can propagate both softwood and hardwood cuttings. However, most people choose softwood cuttings over hardwood.
Take cuttings from healthy, pest- and disease-free plants. Early in the day, select and cut a pliant new branch—one that is just hardening up from green to brown.
Next, cut the branch into small segments (4 to 6 inches long) and remove the lower leaves, leaving the top set intact.
In a bucket, prepare a sterile medium from peat moss and sand in a 50/50 ratio and moisten it until crumbly. Do not use regular soil.
Transfer the mix to 2-4-inch pots and dip the bottom third of each cutting into rooting powder.
Now, use a pencil or a piece of a stick to poke holes in the medium. Insert the end of the branch into the hole, being careful not to rub off the rooting compound.
Cover the pots with clear plastic bags and secure them with elastic bands. Keep the pots in a bright, warm area away from direct sunlight.
Also, remove the bags every few days and mist the cuttings with water. Just remember to cover them back up.
When the roots feel firm after a gentle tug, it is time to move the cuttings to a bigger pot in quality potting soil.
Water regularly and remove the plastic bags. Also, keep the young elderberry plants warm.
Use an all-purpose, water-soluble fertilizer once a month until you are ready to plant in sunny, humus-rich garden soil.
Caring for Elderberry Bushes
- The plants do like plenty of water, especially in hot spells, but they should not become sodden.
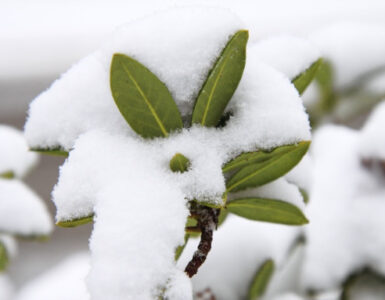
- Elderberries don’t mind humidity much, but they like cool, moist conditions better than hot, dry ones.
- Again, these plants thrive without too many added nutrients if initially planted in soil with plenty of organic matter.
- Weed control: Keep the elderberries free of weeds with careful weeding, as the roots are shallow and should not be disturbed.
- Pests and diseases. Scale insects, mealybugs, elder borer, and aphids can attack these plants. They can also be prone to canker, powdery mildew, leaf spot, and other diseases [2]. Various organic control methods should eliminate them.
- Remove dead, diseased, or damaged canes from the trunk. Ensure that the elderberry bush is at least three years old before pruning.
Harvesting
Harvest when the berries turn dark purple or black. Cut big clusters with pruning shears.
Next, collect them in a bucket or plastic bag. Finally, remove the berries from the toxic stems and leaves.
You can now freeze, dry, make syrup, pie, etc. We have an upcoming article on how to preserve and use elderberries.
Takeaway
Elderberries bring beauty to gardens and kitchens. Their bright green, glossy leaves, lovely clusters of white flowers, and delicious fruits add much to any space.


Add comment