There are a few things to remember if you want to save seeds for next year or longer. Below are some tips for beginners.
Saving vegetable seeds is an easy way to save money and keep growing your favorite crops. Many gardeners save seeds from tomatoes, beans, peppers, cucumbers, and squash because these crops are easy to collect and store.
How to Save Vegetable Seeds for Next Year
These simple steps will help you save and store seeds for future planting.
1. Choose Open-Pollinated Varieties
Open-pollinated plants produce seeds that grow into plants very much like the parent plant, as long as they do not cross with a different variety of the same species [1].
Unlike hybrid plants, open-pollinated plants let you save seeds that will usually grow true to type.
Heirloom seeds are open-pollinated varieties that have been passed down for many generations. You can preserve these seeds for replanting year after year.
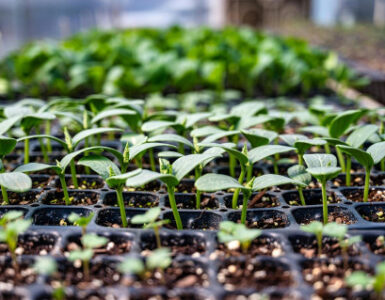
2. Grow Enough Plants
Grow more than one healthy plant if you can.
This gives you more seeds to save and improves pollination for crops like corn and squash.
3. Collect Mature Seeds
Wait until the seeds are fully ripe before collecting them. For example, bean pods should be dry and brittle, while tomatoes should be fully ripe or even a little overripe.
4. Save Seeds from the Best Plants
When saving vegetable seeds for replanting, collect seeds from the best plants. Choose from the healthiest and do not save seeds from diseased plants.
This method is similar to natural selection: if you want larger fruit, you collect seeds from the largest and best of the previous year’s crop.
Repeat to continue producing healthy crops year after year.
5. Harvest the Right Way
Depending on the crop, there are two methods for harvesting seeds: dry or wet.
Dry-seeded crops, such as beans, peas, lettuce, corn, cauliflower, and bok choy, should be left on the plant until the seed pods or seed heads become dry and brown.
If the outer covering is brown and crumbly or ready to pop for peas and beans, it’s usually time to collect the seeds. Allow the pods to dry out completely.
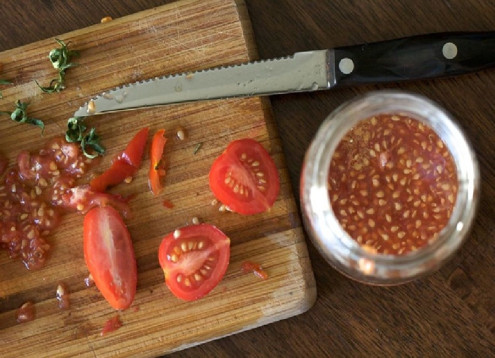
Wet-seeded crops have seeds within the fruit’s moist flesh. Examples are tomatoes, cucumbers, peppers, squash, pumpkins, and watermelons.
With wet seeds, you’ll need to leave some fruit on the plant until it’s a little overripe. Next, squeeze or press the seeds from the flesh, wash them off, and dry them.
6. Thoroughly Clean Seeds
Most dry seeds, including those of vegetables, flowers, herbs, and beans, require minimal cleaning.
Winnowing removes chaff from grains and flower heads. You can toss it between containers to blow away the husks. However, rolling or rubbing the chaff can also work.
Cut the fresh fruit and remove the surrounding pulpy gel. Next, extract and wash the seeds.
Tomato seeds can sit in a jar of water for 2 to 3 days to loosen the gel around them. Then rinse and dry the seeds well.
Finally, spread the seeds on a plate, coffee filter, or fine screen until they are completely dry.
7. Dry Before Storing
Ensure the seeds are dry before storing. Choose a well-ventilated room and spread the seeds out, leaving gaps between them so the air can reach each one.
You can place them on paper towels, plates, baking sheets, or anything that allows enough space for the seeds to spread thinly. However, do not use paper towels if the seeds are wet, as they will stick to the paper.
It’s even better to place them on a screen mesh, so the air reaches both the top and bottom.
To properly dry seeds for next year, let the seeds dry in a warm, airy place for 1 to 3 weeks. Larger seeds may need a little longer.
8. Store Properly
To preserve seeds for planting, they must be completely dry and stored properly.
Collect the dried seeds and put them in seed packets with identifying labels. Use a silica gel packet or another moisture absorber if possible.
Next, put the packets into glass jars or other airtight plastic containers and store them in a cool, dark, dry place.
You can store seeds in a cool, dark, dry place or in an airtight container in the refrigerator. The refrigerator is one of the best places for long-term storage because it stays cool and dry.
If you want to store seeds for several years, freezing is another option. Make sure the seeds are completely dry before freezing them.
Pack the completely dry seeds into airtight glass jars or other airtight containers before freezing them. When thawing, leave the containers to thaw slowly at room temperature for at least a day.
9. Put on Your Labels
Mark the date harvested on the packets. Also, keep the packets in separate, labeled boxes or containers so you do not get confused later.
You can buy labels, markers, or a seed-saving kit.
10. Test Seeds for Germination Before Planting
Use some kitchen paper towels for this process.
Loosely wrap about 10 seeds in a damp paper towel. Leave them in a warm place and check them every day. Keep the paper towel moist.
Many vegetable seeds sprout within 5 to 10 days, but some may take up to two weeks or longer. The warmer the area, the faster most seeds will sprout.
Seed Viability: How Long Do Saved Vegetable Seeds Last?
Many seeds stay viable for several years if you keep them in a cool, dry, and dark place. However, some seeds last longer than others. As seeds get older, fewer of them may sprout.
Here is how long some common garden seeds usually last:
- Tomato: 4–6 years
- Pepper: 2–4 years
- Cucumber: 5 years
- Squash: 4–5 years
- Pumpkin: 4 years
- Watermelon: 4–5 years
- Melon: 5 years
- Beans: 3–5 years
- Peas: 3–5 years
- Broccoli: 3–5 years
- Cabbage: 4–5 years
- Cauliflower: 4–5 years
- Kale: 4–5 years
- Carrot: 3–4 years
- Beet: 2–4 years
- Radish: 5 years
- Lettuce: 2–6 years
- Spinach: 2–5 years
- Corn: 1–2 years
- Onion: 1–2 years
- Parsnip: 1–2 years
- Okra: 2–3 years
These times are estimates. Seeds stored in cool, dry, airtight conditions often stay usable longer.
If you’re unsure whether older seeds are still good, do a simple germination test.
Place 10 seeds on a damp paper towel, fold it over, seal it in a plastic bag, and keep it in a warm spot. After 7 to 10 days, count how many sprout.
If 8 or 9 germinate, the seeds are still in excellent condition. If only a few sprout, sow more heavily or replace the seed packet.
Where to Buy Quality Seeds
If you do not wish to go through the DIY process of saving your garden seeds for next season, the best place to buy garden seeds is from organic retailers such as SeedsNow and Seed Needs.
They offer a wide selection of organic and heirloom vegetable seeds for home gardeners.
Takeaway
Saving vegetable seeds takes a little time, but it can save money and help you grow your favorite plants again next year. With proper storage, many garden seeds remain viable for years, making seed saving a smart habit for every gardener.


Add comment