
Not only do sweet potatoes produce delicious tubers, but they’re also low-maintenance and easy to grow.
Sweet potatoes are a great crop to add to your garden. They can be grown in pots or a spot in your backyard garden.
In this article, we will discuss planting sweet potatoes at home. We will focus on what you need to know to plant and grow them successfully.
Let’s get started!
When to Plant Sweet Potatoes
Sweet potatoes are a great addition to your home garden.
You can plant them from early spring through early summer. However, the best time to grow sweet potatoes is typically spring, after the soil has warmed [1].
Types of Sweet Potatoes
Here are some of the most popular sweet potato varieties you can grow at home:
- Beauregard
- Centennial
- Covington
- Jewel
- Porto Rico
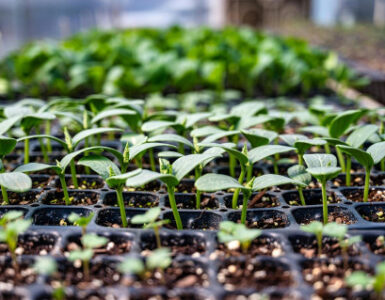
Growing Sweet Potatoes from Slips
Contrary to what you might have heard, you do not grow sweet potatoes from seeds. They are grown from slips.
To grow sweet potatoes from slips, start by sprouting a healthy sweet potato in water or soil until it produces leafy shoots called slips.
With this method, you can say you are growing a sweet potato from a sweet potato that you already have!
Once the slips are about 6 inches long, gently twist them off the mother potato and place them in water until the roots develop.
When the rooted slips are ready, and the soil is warm (about 65°F), plant them outdoors in loose, well-drained soil with plenty of sunlight.
Space them about 12 inches apart in rows and keep the soil moist but not soggy. In a few months, sweet potato vines will start to grow.
Growing in Containers
Growing sweet potatoes in containers is an excellent option if you have limited space.
All you need is a big bucket or pot, something like a 10-gallon container. You’ll also need some potting mix.
Fill the pot with light, well-draining soil. You can also add some compost for extra nutrients.
Now, take your sweet potato slips and place them in the pot, about 2 to 3 inches deep and 8 to 12 inches apart. Gently pat the soil down around them, and water them well.
Place them on your windowsill or in a spot that gets plenty of sun. Be sure to check on your plants regularly and water them when needed.
Fertilizing
Fertilizer is essential for growing sweet potatoes. They need a balanced fertilizer to help provide the required nutrients.
You can use any type of fertilizer, including organic ones like fish emulsion. Just be sure to follow the instructions based on the type of fertilizer you choose.
Also, keep in mind that you do not want to over-fertilize your plants.
Watering Needs
Sweet potatoes also need deep watering. Doing so will encourage root development. Water every few days.
If you are growing in containers, make sure they get full sun and that the drainage holes at the bottom are kept open.
In container gardening, it’s crucial to ensure water drains easily. Otherwise, you risk overwatering and potential root rot.
Pests That Affect Sweet Potatoes
A few pests can damage your sweet potato crops.
The most common ones are flea beetles, sweet potato hornworms, whiteflies, and the sweet potato weevil [2].
Fortunately, it is relatively easy to fight these critters off with natural pest-control methods.
Diseases That Affect Sweet Potatoes
Something else you should know before you start growing sweet potato plants is that they can be vulnerable to some common diseases.
Common plant diseases that can affect sweet potatoes include leaf/stem scab, Fusarium wilt, and black rot.
Likewise, there are natural remedies to help control plant diseases.
Harvesting
Sweet potatoes are ready to harvest about 90 days after planting. That’s when their leaves start to turn yellow and die back. The vines will also begin to droop.
Once you’ve determined your sweet potatoes are ready for harvest, it’s time to get to work!
Carefully dig around the root area of the plants with a shovel or spade. This will help you avoid damaging any part of the root system that’s still in the ground.
Once you’ve spotted the potato (plant tuber), gently pull it out by hand. Once the potato is out of the ground, shake off any dirt clinging to it.
Curing
Now that you’ve harvested your sweet potatoes, you’ll need to cure them. The curing process helps them develop sweetness.
Curing also allows any cuts and bruises on the sweet potatoes to heal.
To cure the potatoes, first place your harvested sweet potatoes in a warm, dry, well-ventilated area for about ten days.
Make sure the temperature is between 80°F and 90°F. After they’ve been cured, gently brush off excess soil with a soft-bristled brush or cloth.
Now they’re ready for storage!
Storing Sweet Potatoes
Store your sweet potatoes in a cool, dry place.
They should be kept in a cool, dark place at about 55°F.
Keep them unwrapped, and they will last about two months at that temperature. You can also keep them at room temperature, but they will only last about a week.
Takeaway
You can enjoy the sweet rewards of growing sweet potatoes at home. Follow the tips above and monitor your plants closely as they grow.
With the right conditions, you’ll be able to reap sweet success with your sweet potatoes in no time.


Add comment