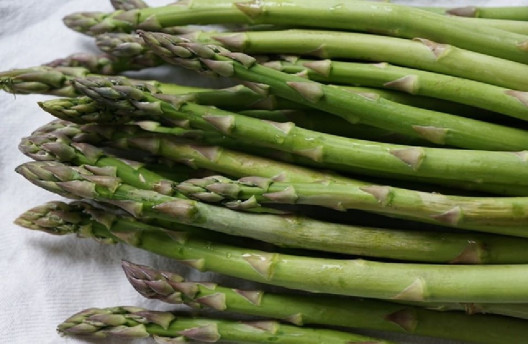
Another delectable vegetable to consider adding to your backyard garden is asparagus. Once established, it will return year after year.
As this is a vegetable that will recur time and again, planting the best variety for your climate is essential.
Below are some tips to consider when growing asparagus at home:
How Long Does It Take for Asparagus to Grow?
One important thing to know about this veggie is that you shouldn’t harvest it in the first year. In the second year, you can harvest it, but only in small quantities [1].
This may seem like a long commitment, but after this period, it will be one of your first springtime crops for ten or more years.
Asparagus is also commonly grown from crowns. These can be purchased from a local garden shop to begin the asparagus crop in your garden.
How Much Sun Does Asparagus Need?
It is a reasonably hearty plant that enjoys full sunlight but can also benefit from periods of shade.
Food stored in the roots feeds these plants even during the dormant winter months, allowing for early spring growth. This means that if they are suddenly kept in the shade for extended periods, the spears’ size can diminish over time.
Soil erosion will also be a factor. On the other hand, provide them with plenty of sun, and these plants will have what they need to store food during periods of shade and cold.
This allows for spring and fall plant harvests of this vegetable. Another consideration is whether it is possible to transplant them into better light and soil.
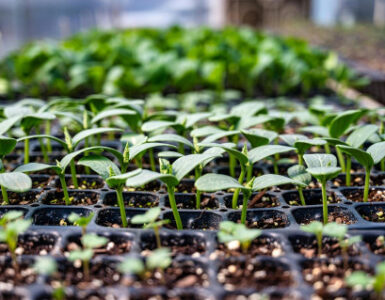
Growing Asparagus from Seed
Asparagus is normally grown from crowns because it matures faster than from seeds. But if you’re not familiar with this vegetable or have never grown it before, planting from seed is your best bet.
To get started, soak the seeds for 4-5 hours. Next, plant each seed at a depth of half an inch in fertile soil. You should start to see new seedlings in 3 to 8 weeks.
Transplant when the seedlings are about 10 to 12 weeks old. Plant them 12 to 18 inches apart in rows of approximately 5 inches in fertile soil.
See also: How to Grow Celery at Home
Growing from Cuttings
Cuttings or crowns are used to grow asparagus in most cases.
The first thing to remember is that these are perennials and will come back year after year. This critical fact should be considered when selecting the planting site for your crowns.
- Utilizing either well-drained raised beds or the ground, dig trenches approximately 12 to 18 inches wide and six to eight inches deep.
- If you wish to cultivate more than one ditch or row, ensure you separate them by a minimum of six inches.
- Soak your asparagus crowns in warm water, then place them 12 to 18 inches apart.
- Next, bury the crowns with compost and topsoil; remember that asparagus needs a neutral, slightly acidic soil base to grow.
As the plants grow, add more soil on top of the original once they are about 2 to 3 inches tall.
Growing in a Pot
Growing in a container is relatively straightforward.
- First, obtain a pot at least 20 inches deep with suitable drainage holes at the bottom. Add some gravel to the bottom of the pot. This will help with fungus when coupled with adequate drainage holes.
- Fill the pot with soil, dig a hole about 8 inches deep, and put a large scoop of compost at the bottom of the hole to prepare the space.
- Place a crown on top, fill with soil, and water well. Over the coming weeks, as shoots appear, water them well and cover them with soil.
- Fertilize the plant with compost over the coming weeks and pick off any red berries that appear.
- In Year Three, the vegetable should be ready to harvest and eat.
- Cut below soil level, leaving the crown behind. In years one through three of these new plants, the results will be dismal or not consumable.
Year three should see your first beautiful asparagus to start enjoying. Along with maintaining the containers and plants, exposure to sunlight should be considered.
How to Transplant
The crop should be transplanted during the dormant stage.
The best time, by far, is early spring, just before they begin to wake from the dormant winter months.
When using garden tools like hoes and spades, be careful. Gently disengage the transplanted vegetable plant’s tentacle-like roots from the surrounding plants to avoid damage.
This complex root system becomes entangled and expands the longer a plant remains in the ground. This significantly adds to the difficulty of moving these plants.
Additionally, too much damage may occur during this process, and a healthy plant may not thrive in its new location.
Once in place, place it in its new growing location, pack the soil around it, water well, and maintain it until it has taken root.
If no extensive damage is done, you should continue to see shoots from the transplantation right on schedule.
Companion Plants
One of the critical factors to consider when planting is the best companion plants to place around asparagus.
Companions such as basil, coriander, parsley, dill, and calendula help repel pests from your asparagus.
Tomatoes are a popular companion plant for asparagus. They help keep asparagus beetles away.
Pests and Diseases
As noted above, the asparagus beetle can destroy your plants, but that is not the only impactful pest or disease.
The fungus can develop if the soil balance is not correct, impacting both your current crop and future asparagus.
Ensure good drainage. If you see wilting, discoloration, or less shoot growth, address the issue right away. Remove the plant or fix the problem to stop it from spreading.
Discolorations of the crown and shoots could indicate diseases such as Fusarium species [2], rust, crown and spear rot, and/or purple spot.
Additionally, aphids, thrips, Japanese beetles, mites, lygus bugs, whiteflies, cutworms, and many other bugs love to feast on the leaves and spears. These pests can cause significant damage to plants.
Damage can stunt or even kill the plant for good. Check for damage, cull out areas with bug issues, and remember to use companion plants as a defense.
Organic fungicides such as Rango, Bonide, and Debug can help control most of these pests and diseases.
Do not let even minor damage go for long, or you could lose plants that should be able to produce for years to come.
Harvesting
The good news is that your asparagus will be one of the first crops ready to harvest each spring.
Cutting or breaking the spears as close to the root as possible is the best harvesting method.
Additionally, spears will continue to grow but should stop being harvested after about a month. This allows the plant time to rest, and the extensive disturbance it undergoes won’t overwhelm it.
Also, there may be spears underground, so minimizing disturbances will help them sprout more efficiently.
Takeaway
When seeking a healthy, recurring vegetable for your garden, look no further than asparagus. This relatively easy perennial plant requires minimal maintenance and can liven up snack time and meals.
With some planning and regular care, you can enjoy this vegetable in your garden for years from just one crown.


Add comment